
1985 Honda BIG RED 250ES Rear Differential Rebuild PART 1 of 2 Disassembly
- justbigreds
- Mar 20, 2023
- 5 min read
Updated: Mar 28, 2023

This post will cover rebuilding the rear differential on your 1985 Honda BIG RED 250ES. The rear differential is a critical component of your BIG RED that does need maintenance. Putting off the maintenance can lead to component failure. It's important to know that as of this post date the ring gear, pinion, differential cases, and ring gear splined sleeve are not available new anymore.
The differential rebuild will require some special tools that some may not have. I will include a list of tools in this post. I should say that you can take the cover off of the rear differential for inspection without any special tools. Taking the differential fill plug out for an inspection will provide very limited results. Also note that the differential seals can be replaced without major disassembly.
Here a brief list of some of the special tools you will need:
Press - A press will be needed to press the old bearings out and the new bearings in
Brass Drift - Used to knock the pinion out of the case ( a Honda special puller can be used too)
Bearing/seal drivers - This are used used with the press for bearing and seal removal/installation. Sockets that match the bearing outside diameter can be used too
Pinion locknut socket - This socket can be purchased from a source like ebay. This tool can also be fabricated from some square tubing. HERE is a link that covers that.
Welder - A welder is needed to remove the small pinion needle bearing
Impact gun - Not absolutely necessary but definitely a help in removing case bolts and pinion nuts
Holding fixture - I made a holding fixture out of some angle iron. This fixture was used to hold the differential case while pressing in the pinion bearings. More details on this fixture in part 2 of this topic (assembly)
I am not going to cover removing the rear differential and draining the differential oil in this post. If you need information on this check out the factory service manual which is available for free at 3wheelermanuals.com.
THIS IS VERY IMPORTANT BEFORE YOU PROCEED! Once the rear differential is removed check out the ring gear splines. If the splines are worn bad it may not be worth rebuilding the differential until a replacement with good splines is obtained. As mentioned above these are not available new at this point. If the splines wear enough they will not transmit the torque to the rear axle and wheels. The engine will rev in gear and not move. You will probably hear a loud popping/clicking noise. This happened to one of my BIG REDS. HERE is a post that covers what I found. Note that the splined sleeve can be removed from the ring gear.


Worn splines on the left and good splines on the right. Notice the worn splines look flat. If your splines look like the ones on the left I would concentrate my efforts in finding a sleeve with splines like the picture on the right before proceeding further.

Above is a picture of the rear axle that came out of the differential from the picture on the left. The axle splines are worn also and I would replace the axle. The splines work together so you don't want to match worn splines with good splines.
This rebuild will also include some media blasting and painting. Here is a few "before" pics.


First remove the differential cover bolts.

I use a vice with soft jaw inserts to hold the differential.

Using the impact gun gently to remove the differential cover bolts. In many cases these bolts have not been removed since new.

Once all the bolts are removed use a small pry bar or screwdriver in the slots shown above to remove the cover. Take your time and work your way around. You do not want to crack the case.

Ok the cover is removed. This will allow you to make a quick overall inspection of the unit.


Note that there is typically a shim on both sides of the ring gear. The shims are used for correct tooth contact and backlash between the pinion and ring gear. I will tag them as soon as they are removed so I ensure they are installed in the correct position.


Use a seal puller or screwdriver to remove the seals.


Used a special socket to remove the pinion bearing locknut. To buy this tool just type in "1985 Honda 250es rear differential pinion socket" in your favorite search engine and you should be able to find a place that sells them.


MN250R shared this tip on the justbigredsforum. He used a 1.5" X 1.5" piece of square tubing to remove the pinion bearing locknut. HERE is a link for more information.


Used a brass drift and a hammer to knock the pinion out of the differential case. The brass is softer than the steel so it won't damage the pinion.


Used the vice and impact gun to remove the pinion nut.

Remove the nut and coupler from the pinion shaft.

Bath time. I cleaned up the parts before using the hydraulic press.


Used a hydraulic press and a socket to press the bearings from the case.


Installed the nut onto the pinion shaft and then put a socket on the nut. Used the socket and nut to press the bearing off the pinion shaft. This is a light press fit so you don't have to worry about damaging the threads.

Part of the bearing inside diameter will probably be retained on the pinion shaft after the bearing is pressed off. Use a brass drift and a hammer to remove the bearing inside diameter.

Note that there is a shim between the pinion bearing and coupler. This is used for tooth contact and backlash. I tag it for assembly later.


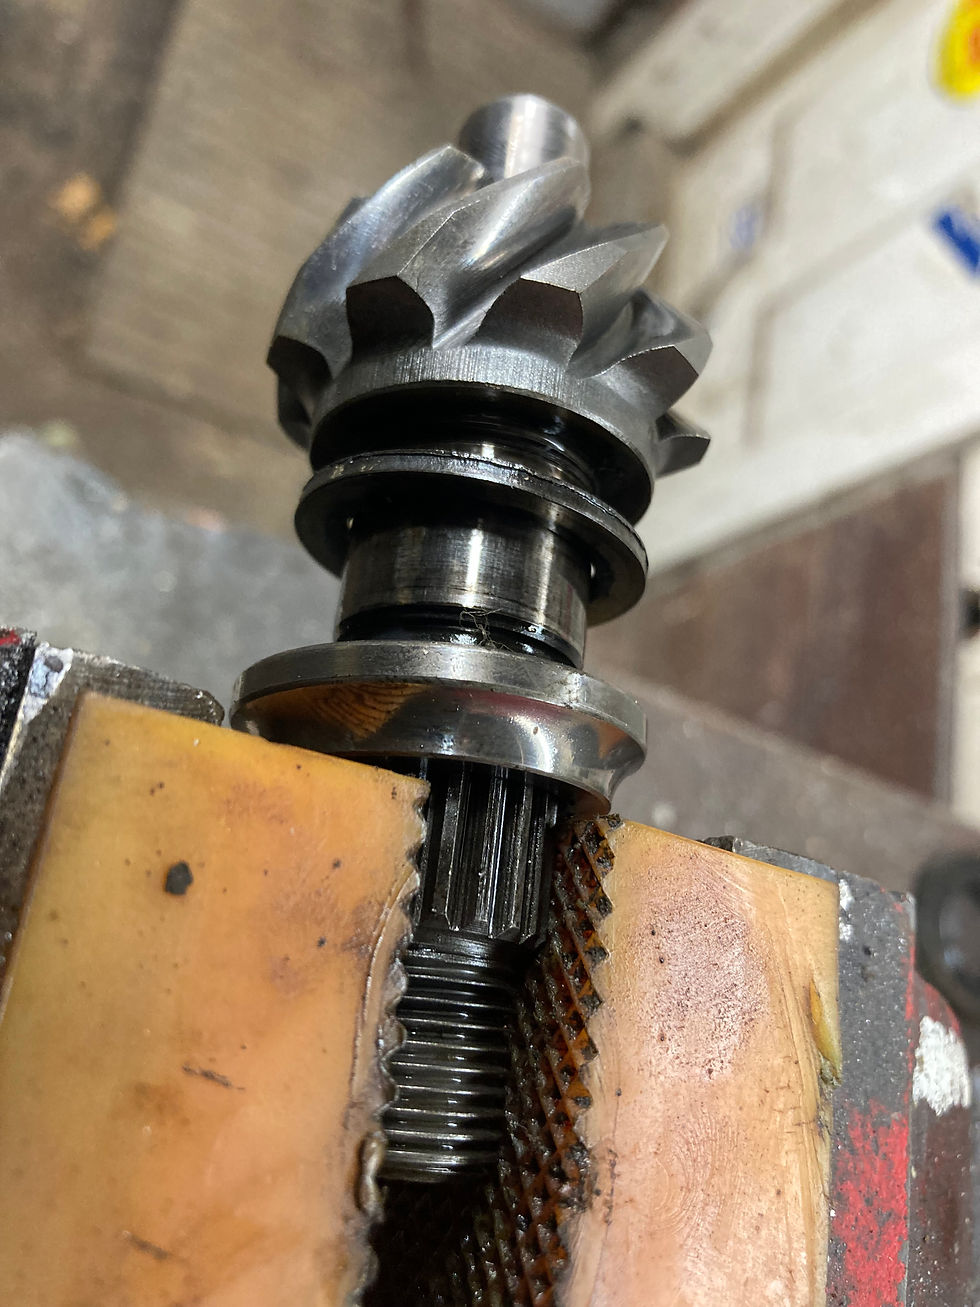
On to removing the pinion bearing out of the differential case. I used a piece of 1/2" threaded rod and inserted it into the bearing. I then tack welded the bearing to the threaded rod with a mig welder.


I then attached a weight to the threaded rod and knocked the bearing out of the case just like a slide hammer.
This completes the disassembly. I wanted to clean up cases so I prepared them for media blasting.

Put the case back together and masked the openings as prep for the blast cabinet.

In the blast cabinet. I will blast using glass beads.


After glass bead media blast. Make sure the case is completely cleaned of the glass bead media before reassembly is started.
Next part I will start the reassembly.
Here's a link to a video that I found helpful. It is covering a TRX 300 but it is very similar to the 1985 250ES BIG RED rear differential. Note that the 1985 250ES BIG RED rear differential does not have the pinion bearing lock ring that is shown in the video.


Comments